
Ian says something in the first workshop of the Rural Sketch Course that sounds like a passing remark and is actually the entire course.
He is standing by the River Brathay looking at two trees, a riverbank and a line of mountains behind, and he says: "that's what landscapes are about, trying to create that space with layers, so layers that you can draw and then layers that you can paint, layers that you can add tone, layers that you can add texture."
That is why your countryside sketches come out flat, and it is also a list of the four places you can fix it.

Perspective only covers a tenth of it
Draw a street and the geometry does half the job before you have thought about it. Lines converge. Windows shrink as they go back. Kerbs run to a point. You find the vanishing point, commit to it, and depth arrives on its own.
None of that switches off when you walk into a field. The wall in front of you still runs away and still gets smaller, and Ian says so while he is drawing one:
“"we've got that sense of perspective because that wall there is the same size as that wall there, but because it's much further away, it looks a lot smaller."”
– Ian Fennelly
The trouble is how little of the picture it covers. A wall, a gate, a road. Everything else is trees, hedgerows, fields and a mountain, and not one of them has a straight edge to converge. So the tool that has carried you through every street sketch you have ever done is suddenly handling a tenth of the scene, and nobody mentions that when you swap a street for a valley.

Count the layers before you draw anything
At every location on the Rural Sketch Course, the first thing Ian does is not draw. It is look, and name what he is looking at.
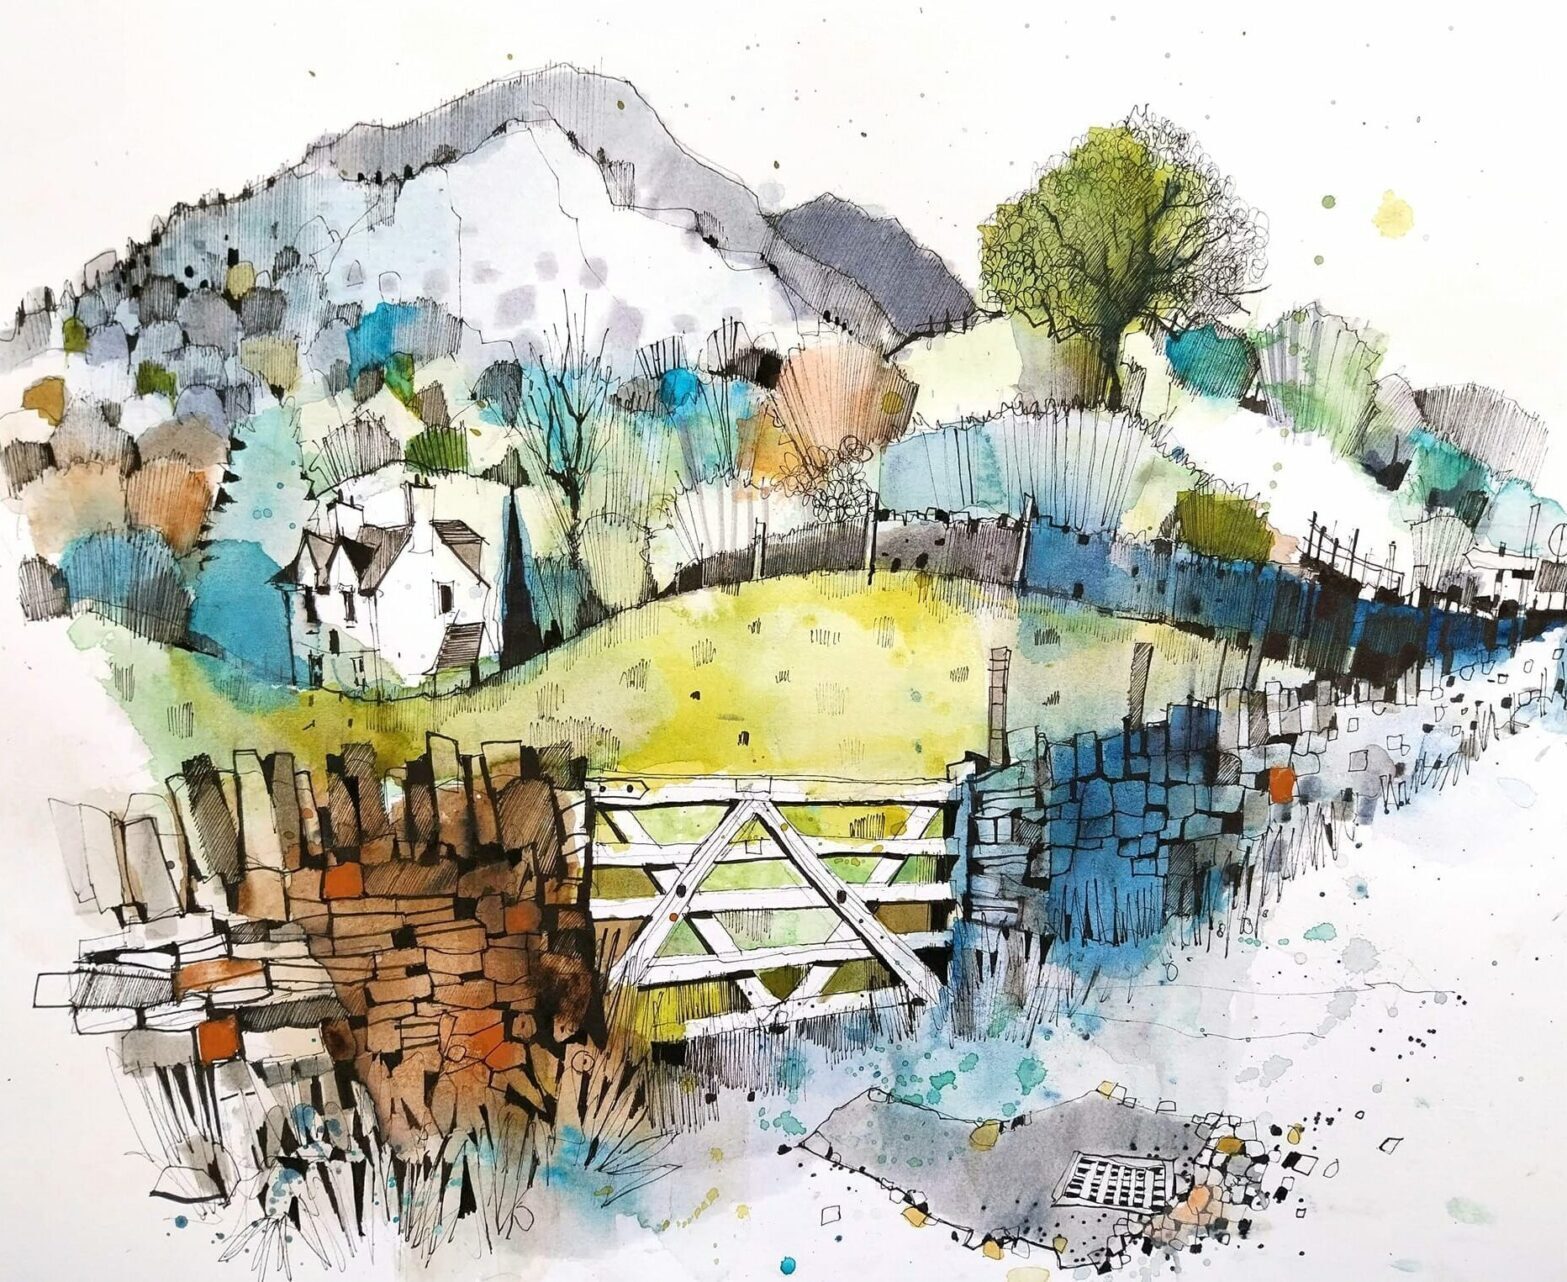
“"With landscapes, it's very, very important, I feel, to get a strong sense of foreground, middle ground, and background."”
– Ian Fennelly
Two trees, then the river and the bank, then the mountains. Or a dry stone wall, then a field running down to a cottage, then a fell. Six locations, same fifteen seconds at the start of each.
It is not always tidy. At Birk Howe Farm the gate causes trouble, sitting in front of everything and belonging to no single layer. Which is the point. Naming them is not a formality, it is the decision the rest of the sketch hangs off.

Then treat each layer differently, four ways
Here is where that first remark earns itself. Layers you can draw, paint, tone and texture. Four separate levers, and most flat sketches have pulled none of them
Drawing.
The line gets finer as things go back, and heavier as they come forward. "Just because this is further away, I just want it to be a smaller, thinner line just to create a better sense of depth really." It works the other way too. When a tree starts disappearing into the hillside behind it, the fix is a thicker pen on the tree, not more work on the hill.
Colour.
Cool colours retreat. Ian is blunt about it: "now we need blue in all these landscapes, we need to push back." Worth knowing the palette is chosen scene by scene rather than fixed. Two of the six workshops run on three complementaries, Windsor Blue, Transparent Orange and Windsor Green. Another gets four, and one of those, Manganese Blue, is there specifically for the distance because of how the paint behaves rather than what it looks like. If you have never sorted your own paints into transparent and opaque, that is the ten minutes that changes everything, and we went through how in Transparent vs Opaque Watercolour For Urban Sketching.
Tone.
The one people skip. "You can differentiate between the foreground, the middle ground, and the background really through depth in terms of how much tonal value you put on." Darkest at the front, palest at the back. A landscape with three clear tonal bands will read as deep even in pencil.
Texture.
Marks belong to the front. On the layered landscape it is the scruff of weeds at the bottom of the wall that does the work, scribbled in with the finest pen he owns. Nothing at the back gets that treatment, which is exactly why the front reads as near.
Pull all four in the same direction and the layers separate. Pull none and you get a careful, accurate, flat drawing.
The middle is supposed to look unfinished
The hardest part is leaving the middle alone.
On one of the workshops, a single wash of Green Gold was the entire treatment of the field between the wall and the mountain. No second pass. No building up. No going back to add interest.
It looks unfinished because that is what distance looks like. The gap in the middle is what the eye travels through on the way from the gate to the fell, and filling it in closes the space you were trying to open.
If you find yourself reaching for more detail in the middle of a landscape, that is usually the moment to put the brush down.
Depth is decided earlier than you think
Ian's order for a whole sketch is worth carrying around. Big shapes. Line. Colour. Tone. Detail.
Which tells you something useful about rescuing a flat sketch, namely that you cannot, not at the end. Depth is settled by the time the tone goes on, and adding more detail afterwards is exactly what most of us try.
It is also why a landscape can look wrong at the line stage and still come good. At the drawing stage the layers are not visible yet. They only separate once the colour and the tone arrive, so a line drawing that looks flat is not evidence of anything.
If it is going flat, go back a stage rather than forward one.
Three things to do on your next one
Say the layers out loud before you open the sketchbook. Foreground, middle ground, background. Point at each one. It feels daft in front of other people and it is still the highest-value fifteen seconds of the whole sketch.
Pick which lever this particular view needs. You do not have to use all four equally. A scene with a big near object wants texture and line weight. A hazy valley wants tone and cool colour. Deciding which one is carrying the depth stops you spreading effort evenly across a picture that needs it uneven.
Do the squint test before the detail stage, not after. Step back, screw your eyes up until the detail disappears, and count the bands of tone. If you can see three, carry on. If it reads as one, the depth is not there yet and no amount of hatching at the end will put it there.
Ready to learn more?
The Rural Sketch Course is six workshops across the Lake District, each one a different location worked from the first pencil shapes to the last bit of hatching. Layering is the thread running through all six, which is why it is the thing to learn first if your buildings are coming along nicely and your countryside keeps arriving flat.
- More Blog Posts -

How to Draw Signs and Lettering in Your Urban Sketches
Plain letters first, chunky letters second, and always check the spelling.
Read more
Why Your Landscape Sketches Look Flat (And The Fix)
Perspective does most of the work in a street and almost none of it in a field. Here is what Ian does instead, and the four ways he separates a foreground from a background.
Read more
Our 4 Week Urban Sketching Experience: What Riomaggiore Taught Us
The lessons that came back again and again from the hardest scene we have set.
Read more
Why Sketching the Same Scene Twice Teaches You More Than Moving On
Most sketchers move straight to a new subject. Here is what the second attempt gives you that the first cannot.
Read moreDid you enjoy this article?
Thanks for your feedback!
